TerrAqua Eco-Column 2014
|
|
|
|
|
|

Introduction
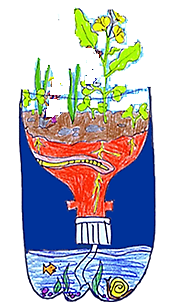
What is an ecosystem? As one of the most encompassing levels of organization in the living world, an ecosystem is defined as a community of organisms along with their physical environment. The Eco-Column is designed to model an ecosystem on a small scale. Its components include a terrestrial habitat with a compost unit, and an aquatic habitat. This system provides opportunities to understand how energy is brought into the living world and transferred through food chains, and how the living and nonliving environments are intimately connected through cycles of matter.
What common substance falls from the atmosphere, flows through our bodies, runs through the soil beneath our feet, collects in puddles and lakes, and then vaporizes back into the atmosphere in a never-ending cycle? The answer is water, as it cycles between land, ocean and atmosphere, forms the major link between the terrestrial world (involving anything living on the earth) and the aquatic world (involving anything living on or in the water).
Water drips off rooftops, flows over roads, off your toothbrush, and down the drain, percolates through the soils of fields and forests and eventually finds its way into rivers, lakes and oceans. During its journey, water will pick up leaf litter, soil, nutrients, agricultural chemicals, road salts and gasoline from cars, all of which have profound impacts on life in aquatic systems. Water can also be filtered or purified as it percolates through soil.
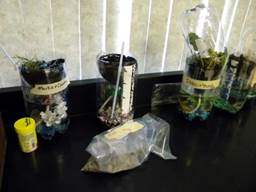
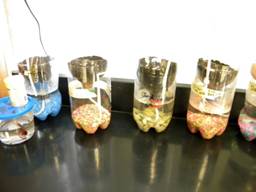
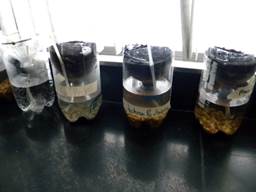
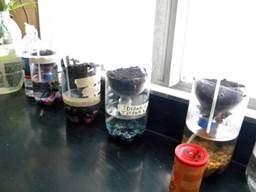
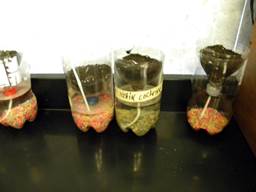
The TerrAqua Eco-Column provides you with a model to explore the link between land and water. The model has three basic components: soil, water and organisms (plants and/or animals). By varying the treatment of just one of these components you can explore how one variable can affect the whole system. The hypothesis is that if a model of an ecosystem can be built, then a better understanding of how an ecosystem works will be achieved.
|
|
|
|
|
|

Procedure
Materials
|
Stock Table:
Bottle Caps* – may be pre-drilled 40 lb (18 kg) Bag of Top Soil Cotton Clothesline Rope – may be pre-cut Large Spoons – for soil Scissors (Sharp Point) Cotton Balls Metric Ruler Straws Water
Hole Punch Paper Fasteners / Large Paper Clips
|
Group Responsibilities: Groups of 2-4
(1) Clear and Cleaned 2 Litter Soda Bottle with Cap* (2) Cups (460 mL) of Aquatic Gravel or “Very Small “Cleaned” Stones / Pebbles”
Terrestrial Animal(s) – see “list” Terrestrial Plant(s) – see “list” Aquatic Animal(s) – see “list” Aquatic Plant(s) [Optional] – see “list”
Food for Living Creatures
Method to House Any Terrestrial Animals that May Try to Escape (ie screen)
|
|
|
|
|
|
|

Steps:
1. Gather all necessary materials for this activity.
2. Drill a hole in the bottle cap while still on bottle (may have been done already).
3. Remove any labels from the bottle and cut bottle ~ 2/3rds from the bottom.
4. Cut ~ 20 cm length of rope/wick (may have been done already). Thread rope through the bottle top, invert the top, and set the top into the “base”. The bottom of the “wick” should reach the bottom of the reservoir and thread loosely through the cap.
5. Remove the top with the cap/wick and fill the reservoir with enough gravel to just cover the bottom and then add enough water (optional: clean pond water) until the reservoir is about 1/3rd full (or just enough to touch the “cap”).
6. Return the top with the cap/wick to its inverted position again. Place a cotton ball down and around the wick.
7. Add a little bit of gravel and then add enough topsoil to cover the wick/rope and fill the top chamber most of the way. To be effective, the wick should run up into the gravel and soil mix and not be plastered along the side of the bottle. Finally, use a straw between the top and bottom reservoir to provide air to the bottom water reservoir area.
Note: If your top is slipping into the water reservoir, ask for tool to create 3-4 holes and use paper fasteners to clamp the top to the top of the reservoir.
8. Label your project with your name(s) with a marker and place your Eco-Column in a designated area and maintain its growth and health (PICK UP FROM THE BOTTOM).
9. After about 1-2 days, add your organisms. Be sure to add water and take care of any organisms as necessary during the allotted time (to be announced).
10. Please clean and return all materials. The Result/Data sheet will need to be completed after the designated time (to be announced) is up for observing and maintaining your eco-column.
Note: Feel free to be creative and/or add a design theme to your column.
Reference: Hunt, K. (n.d.). Bottle biology. Retrieved from http://bottlebiology.org/index.html