Cnidarian Lab: Response of Hydras to External Stimuli 2015
Introduction
How do hydras respond to light? Hydras, a type of Cnidarian, are some of the simplest known animals to have a nervous system. Cnidarians gather information from their environment using specialized sensory cells. Both polyps and medusas have a nerve net, shown in the figure below. A nerve net is a loosely organized network of nerve cells that together allow Cnidarians to detect stimuli such as the touch of a foreign object. The nerve net is usually distributed uniformly throughout the body, although in some species it is concentrated around the mouth or in rings around the body. Cnidarians also have statocysts, which are groups of sensory cells that help determine the direction of gravity. Ocelli (oh-sel-eye; singular: ocellus) are eyespots made of cells that detect light. Many hydras, such as the green hydras, have a symbiotic relationship with algae. The alga has a place to live and provides nutrients to the hydra by performing photosynthesis. If one were to compare how green hydra and brown hydra react to light, then a better under-standing of why green hydra are attached to light will be achieved.
Method
Apparatii
|
Green Hydras – pre-ordered Brown Hydras – pre-ordered
Microscope Slide w/ Well (cover slip)
Spring Water (6) Test Tubes with Screw Caps Test-tube Rack Metric Ruler Eye Dropper
|
Aluminum Foil Transparent Tape Magnifying Glass Pencil (only) Light Source Desk Lamp References
|
Procedure
|
|
|
|
|
|
Day 1:
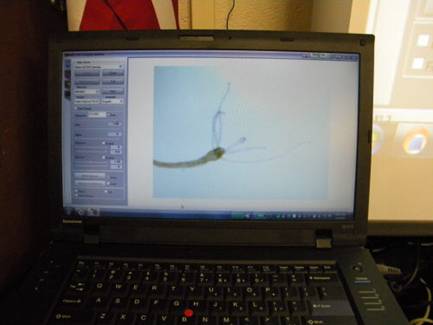
- Using an eye dropper, carefully remove (1-3) hydra(s) from their container with minimal amount of water and place it/them on a clean slide; do not use a cover slip.
- Observe the hydra under the microscope at different levels of power; adjust the lighting if necessary. Make a mental note about size, shape, color, movements …
- Remove the slide (clean, dry and return) and turn off the microscope.
- Using a pencil, number each of the test tubes (1-6).
- Fill each test tube with pond or spring water to within about 2 cm from the top.
- In test tubes (1-3) use an eye dropper to gently place three (3) brown hydras into each tube.
- In test tubes (4-6) use an eye dropper to gently place three (3) green hydras into each tube.
- Wrap the bottom half of each test tube in aluminum foil.
- Tightly cap all 6 test tubes.
- Place test tubes 1 and 4 right side up in the test tube rack.
- Place test tubes 2 and 5 upside down in the test tube rack.
- Tape test tubes 3 and 6 together. Place tape only on the foil or caps.
- Place your test tube rack in the designated light source place.
- Lay test tubes 3 and 6 on their sides next to or on the test tube rack.
- Label your test tube rack with a small piece of paper and/or tape.
- Make sure that all test tubes are equally well exposed to the light source.
- Ask yourself (confer with your partner), what would you hypothesis might happen based on your knowledge of hydras and photosynthetic relationships.
- Clean and put away all materials.
Day 2:
Note: If you have not done so, see step #17 above before retrieving/observing your hydra.
- Carefully (do NOT invert or set upright any test tubes) return your hydras back to your lab table.
- Using a magnifying glass and desk lamp, count the number of hydras in the light and in the dark in each test tube one at a time. Note: remove foil if necessary to count those in the dark part of the tube.
- Record these observations in the data table for your group.
- Totals may be figured for the class when all groups are done observing/recording.
- Answer questions proposed at the end of this lab. Clean and put away all materials.