“2-Ply” DNA Replication Activity
“Modeling a Replica of DNA in Somatic Cells”
Introduction
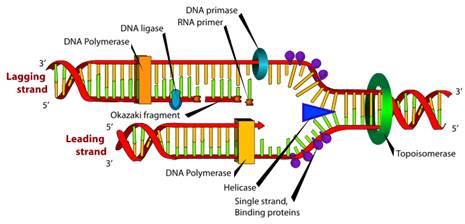
The process of making an identical copy of a section of duplex (double-stranded) DNA, using existing DNA as a template for the synthesis of new DNA strands. In humans and other eukaryotes, replication occurs in the cell nucleus.
Method
Apparatuses (Groups of 4-5)
|
(1) 2-Ply T-Paper Role Box of Kleenex (4) Zoo-Pals Plates (8) Dixie Cups White Plastic Spoon White Plastic Fork White Plastic Knife |
Fine Tipped Black Marker Scissors Meter Stick Clear Tape (Dispenser) Masking Tape References
|
|
|
|
Procedure
Gather all necessary materials for the activity. Read the entire step before performing the action(s). After each of the following steps/
bullets, a checked off for completion:
|
|
|
Unwinding:
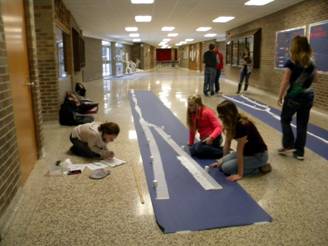
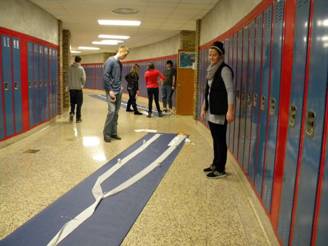
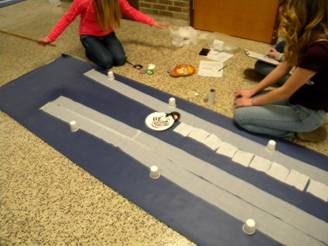
Š Using the T-paper roll, have one person hold onto one end and have another person unroll the 2- ply T-paper while giving it a “slight” twist down a designated area in the room for about 8 meters. The T-paper, being 2-Ply and twisted, is to represent a nucleic double-helical DNA molecule that would be found in a somatic cell (or gamete). In addition, each square of the T-paper is to represent a DNA nucleotide. Lay the T-paper down.
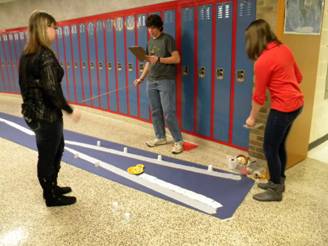
Š Using a spoon to represent an initiator protein, place the “protein” at the beginning of the DNA molecule in order to represent the beginning of a fork style replication process.
Š Remove the initiator protein. Unwind the DNA at the initiation location by pulling the 2-ply apart and laying the tissue flat on the floor for about 3 meters. Place a plastic fork that will represent helicase (use a marker to write on the handle the name of the enzyme) where the “DNA” is unwinding. Next, add 4 Dixie cups along the outside of each unwound strand near “helicase” to represent single-stranded stabilizing proteins (SSBP). Use 2 pieces of masking tape to fasten down each end of the unwound “DNA” onto the floor. Use a marker to label one end on the tape 5’ end and on the other tape, the 3’ end.
Š Place a plastic knife, to represent topoisomerase (use a marker to write on the handle the name of the enzyme), further down the unwound DNA to represent cleaving taking place in order to release torque building up while the DNA is unwinding.
|
|
|
Creating the Leading Strand:
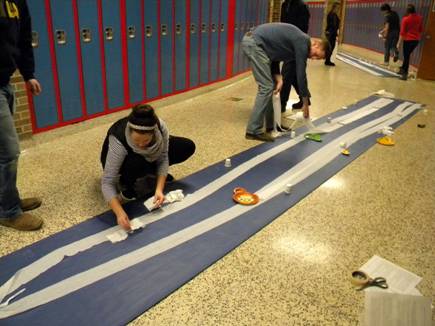
Š Using one Kleenex tissue and a pair of scissors, cut 10 equal squares that should be about the same size as a square on the T-paper; the “DNA nucleotides”. Each Kleenex square is to represent an RNA nucleotide. Create the RNA primer by using your hand(s) as the enzyme primase, to place a RNA nucleotide down next to a DNA nucleotide along the leading strand by matching the squares with each other as close as possible. Your RNA primer should be placed in 5’ à 3’ direction; thus, along the 3’ à 5’ DNA side.
Š Create two DNA polymerases (delta) by using a pair of scissors to cut off the left ear/foot of each of your zoo pal animal plate in order of the plates to better resemble the “glove-like” configuration of a DNA polymerase enzyme with a sliding clamp and proofreading abilities. Once the DNA polymerases have been created, place one of the DNA polymerase enzymes at the beginning of the RNA primer in preparation of adding DNA nucleotides.
Š Unroll about 3 meters more of T-paper and separate the 2-ply in order to have two single sheets of T-paper; you will only need one of the two sides for this step. Since the leading strand is continuous, simply simulate new DNA nucleotides being placed next to the leading strand template. To show this, show the DNA polymerase having moved down the leading strand template followed by the one sided T-paper in a 5’à3’ direction in order to create the 5’à 3’ side of the new DNA.
Š Remove the RNA primer “Kleenex squares” by simulating RNAse H as your hand(s) and by laying down a single sheet of DNA “T-paper” in its place; DNA polymerase helps to do this too. Finally, use clear tape to represent DNA ligase (use a marker to write on the tape the name of the enzyme), by mending the two DNA strands together. Naturally, the initial DNA polymerase would continue adding nucleotides as the DNA unwinds to finish off the leading strand.
Creating the Lagging Strand:
Š Keep in mind that the lagging strand would typically be created practically simultaneously with the leading strand. To begin, create 3 DNA polymerase enzymes as describe previously. Next, create a ten nucleotide RNA primer as mention previously and place the RNA primer, one square (nt.) at a time; about 1 meter from the far end of the 5’ end à 3’ DNA template fork side to be replicated.
Š After creating a single sheet of T-paper of about 2 meters from your 2-ply roll, show how a DNA polymerase, that started at the 3’ end of the RNA primer, made its way down laying new DNA in a 5’ à 3’ direction. Despite the length of the new DNA (~ 1 meter), discard any leftover DNA “nucleotides”. You now should have an Okazaki fragment.
Š Repeat the previous “lagging strand” steps in order to create 2 more Okazaki fragments. Note: Adjust or lengthen your original DNA template to accommodate for 3 fragments total.
Š Remove the RNA primers “Kleenex” and replacement them with DNA nucleotides “T-paper” using DNA polymerases “zoo-plates”.
Š Simulate the mending of the new 5’ à 3’ DNA backbone with DNA ligase “tape”.
Š Show a finished leading strand by completing the strand to the end of your unwound DNA.
Š Show a finished lagging strand by completing the strand to the end of your unwound DNA; however, since somatic cells do not contain the telomerase enzyme, how should the termination area along the lagging strand look since one cannot lay down an RNA primer?
Clean and return all materials as directed.